Sunday, August 30, 2009

Cheddar Chiles

Check out my harvest!


All of the vegetables pictured have been processed and stored.


I used the chiles to make cheddar chiles.
Wash chiles.
Slice in half and remove seeds.
Place center up on a cookie sheet.
Fill center with shredded cheese.
Bake at 450 until cheese is bubbly.
Eat warm.
Also, freezes very well.


This Is Moulting


Poor Butter!
I always wondered what moulting would look like.
It isn't pretty.


Last tail feather.


The temp. has been dropping into the 40's at night
I hope Butter is cuddling up with the other girls.
Poor featherless baby.


Saturday, August 29, 2009

Butter and Pixie

Poor Butter.
On Monday, when I visited the girls
I thought that something had attacked one of them.
There were feathers everywhere!
But I couldn't see any injuries,
so I though perhaps a neighbor chicken
had jumped the fence
and gotten the sharp end of Lavender's claws.
Tuesday there were even more feathers in the run.
It's official: Butter is molting.
And really hard too.
As of today, she has a solitary tail feather loosely hanging on.
She looks so rough - poor baby.
And she is really crabby.
She wants to be held,
but she doesn't want me to touch her.
I suppose the new feathers
growing in are strange feeling and poky.
Well, she ends up pecking
me on the head to get held
and then complaining when I hold her.
Very frustrating.
~
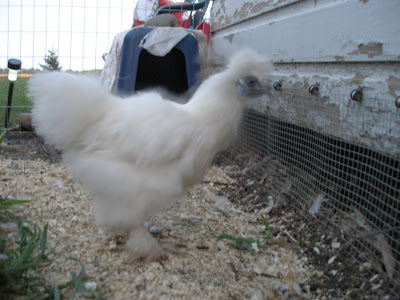
And Pixie is growing up into a pullet.
She squatted for me today. Twice!
It's the first time she's ever squatted.
I see silkie eggs in the future.
~
My friend, Carol, that took in my ladies, has a big barred rock rooster.
He is so gorgeous.
But he loves to chase me!
I have a cut on my ankle he gave me today.
He is so sneaky.
Bad rooster!
~
Another thing I'm worrying about right now:
Last year Carol lost more
than half of her chickens
and all of her ducks.
They disappeared
after some migrant workers were working
in the soybean fields next to her house.
They are back working in the fields right now.
Please don't take my ladies!

Tuesday, August 25, 2009

Update On the Dill Crock

I canned my dill crock today.

First, I strained the brine.

While the brine warmed up to a boil, I packed the veggies into hot jars.

All canned up.
I think it looks very pretty.


Goodnight Ladies

I took my camera with me this evening when I visited the Ladies.
First, lets meet their neighbors.

The rooster.
He is a real meany!
He looks gorgeous, but
I'm scared of him, because he tries to flog me all the time.
I nice little red hen.

I have trouble telling them apart, but they have the softest feathers.


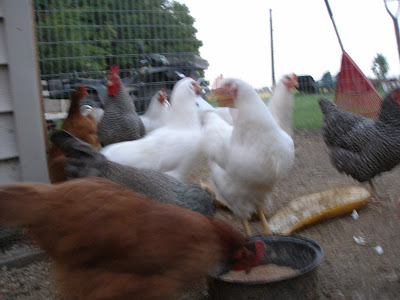
Some of the flock.


Butter!
Checking out the neighbors.


Zela and Butter munching on the snack I brought to them.


Right behind the waterer you can see Little Ray, the cat.


Pixie!


Lavender getting ready for bed.


Butter and Zela getting comfy in their little bed.
They also use this crate to lay their eggs in.

Butter and Zela


Pixie hiding underneath my leg.
She pushed underneath me like a baby chick.
Too cute.


Sleepy.


Monday, August 24, 2009

Eggplant Burgers

These are so yummy!
My mom made these for dinner and invited me over to eat.
Thanks Mom!
I have about 50 ripe eggplant, so I think I will make a few of these and freeze them.
-
Eggplant Burgers
2 med eggplant
salt
4 cloves of garlic
3/4 cup nut butter - almond, peanut, ect.
2 cups soft bread crumbs
-
Slice eggplant into 1/2 in thick slices and sprinkle with salt.
Let eggplant drain in a sieve for 15 min.
Char-broil eggplant on the barbecue until eggplant is soft.
In a food processor blend together eggplant and nut butter.
Mix blended eggplant and bread crumbs.
-
With the eggplant mixture, make patties.
Place patties on a baking sheet
with the cloves of garlic
and bake at 375 degrees for 15 mins.
OR
return the burgers to the barbecue and cook for 10 to 15 mins.
-
Squish the roasted garlic onto the burgers
and serve with toasted hamburger buns.

Harvest Time...sorta

A pictorial tour of the week's harvest.

Onions

Tomatoes!


I have an outdoor sink - that I got for free!
It really comes in handy for washing up the harvest.


Potatoes
Yum.
The purple ones are so sweet, yet still potatoey.
They were still green, so I just took 2 tiny ones from the top.

Tuesday, August 18, 2009

Glass Flower

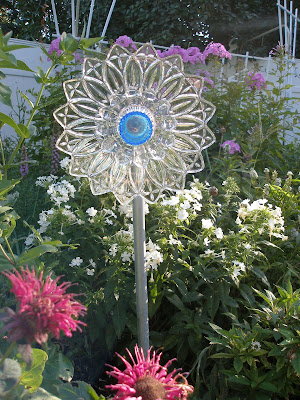
I made a glass plate flower.
It was so easy to make!
One large plate,
one small plate,
and one candle holder.
Glue it together.

Then I glued a thing called a bell hanger
- it's in the plumbing section -
to the back of the big plate.
I then attached a 3/4 in pipe to the bell hanger.
And then I planted it!

Monday, August 17, 2009

Glass Totem Project

This is a glass totem I have been working on.
I finally committed to gluing the pieces together.
A glass totem is made out of found glass pieces,
like plates, bowls, vases, ect.,
that are glued together to make a totem or in this case
flower garden girl.


I use clear silicone glue.
All done!
And ready for the garden.


I would like to find one or two more pieces
to add to it, but I think it turned out
pretty good for my first try!


Friday, August 14, 2009

Canning A Dill Crock

I'm trying to cheer up today. I visited the girls at their new home and they are sleeping warm and cozy, snuggled up with each other.
So, here are the directions for making a dill crock. I mixed mine up on the 9th before all the bad stuff happened.
The vegetables are supposed to brine for 2 weeks, so mine will be ready on the 23rd.
I'll write a post then, after I taste it.
Of, course if it kills me there won't be any more posts
- hint: wait to read my post before you taste yours ;)
ha, ha
This recipe was adapted from Stocking Up III by Carol Hupping
She writes, "Nearly any kind of firm, crisp vegetable is good in a dill crock. Use your imagination along with whatever's on hand, fresh from the garden."
Catalina's Dill Crock:

I started with a clean drink dispenser. First I checked it for leaks. Then I washed it.


First layer: dill, sliced onion chunks, summer squash sticks.

Second layer: carrot coins, grape leaves (too keep everything crisp)


Third layer: Garlic, broccoli


Fourth layer: Onion chunks, cucumbers (washed, blossom end cut off), dried red peppers, black pepper corns


Fifth layer: More dill, green beans (blanched for 80 seconds)


Sixth layer: peeled eggplant, handful of radish pods


Covered with a brine:
1 1/2 cups canning salt dissolved in
6 cups 5% acidity vinegar and 2 gallons water
Weight vegetables underneath brine with a plate.
Use a plastic bag filled with brine to hold plate in place.
After 2 days add 1 cup canning salt to the plate on top of the brine.
Do not pour the salt directly on to the vegetables.
Check daily and skim any scum that forms.
To determine when fermentation is complete, test for bubbles by tapping the container on the side with your hand.
Any bubbles that rise to the surface indicate the fermentation is still occurring.
The dill crock should be ready to can in 2 weeks
(depending on what you put in yours)
Remove vegetables from brine.
Strain the brine; bring to a boil in a large saucepot.
Pack vegetables into hot jars, leaving 1/4 in headspace.
Ladle hot brine over vegetables leaving 1/4 inch headspace.
Remove air bubbles.
Adjust two piece caps.
Process for 15 min in boiling water canner.
~
The book "Stocking up III" also has an interesting recipe for fermenting pickles without salt and using rice bran instead.
I might have to try it.


Sunday, August 9, 2009

County Fair

I won 3 red ribbons!
For my special events, buildings and birds entries.

I wish I could figure out what the judge was looking for, so I will know what to enter next year.


The grand prize winners are in the upper left hand corner.
Not really sure why she picked them for grand prize.


The Lumberjack show!


Lots of vegetable entries.


The biggest vegetable entries.


Mom and Dad checking out the flower entries.

Check out this HUGE sunflower!


Cute goaties!

If I could, I would love to have a goat.
They are so sweet!


Dad and a friendly goat.


Pretty Belgian horse and its baby.