Showing posts with label garlic. Show all posts

Tuesday, July 20, 2010

Garlic Harvest 2010

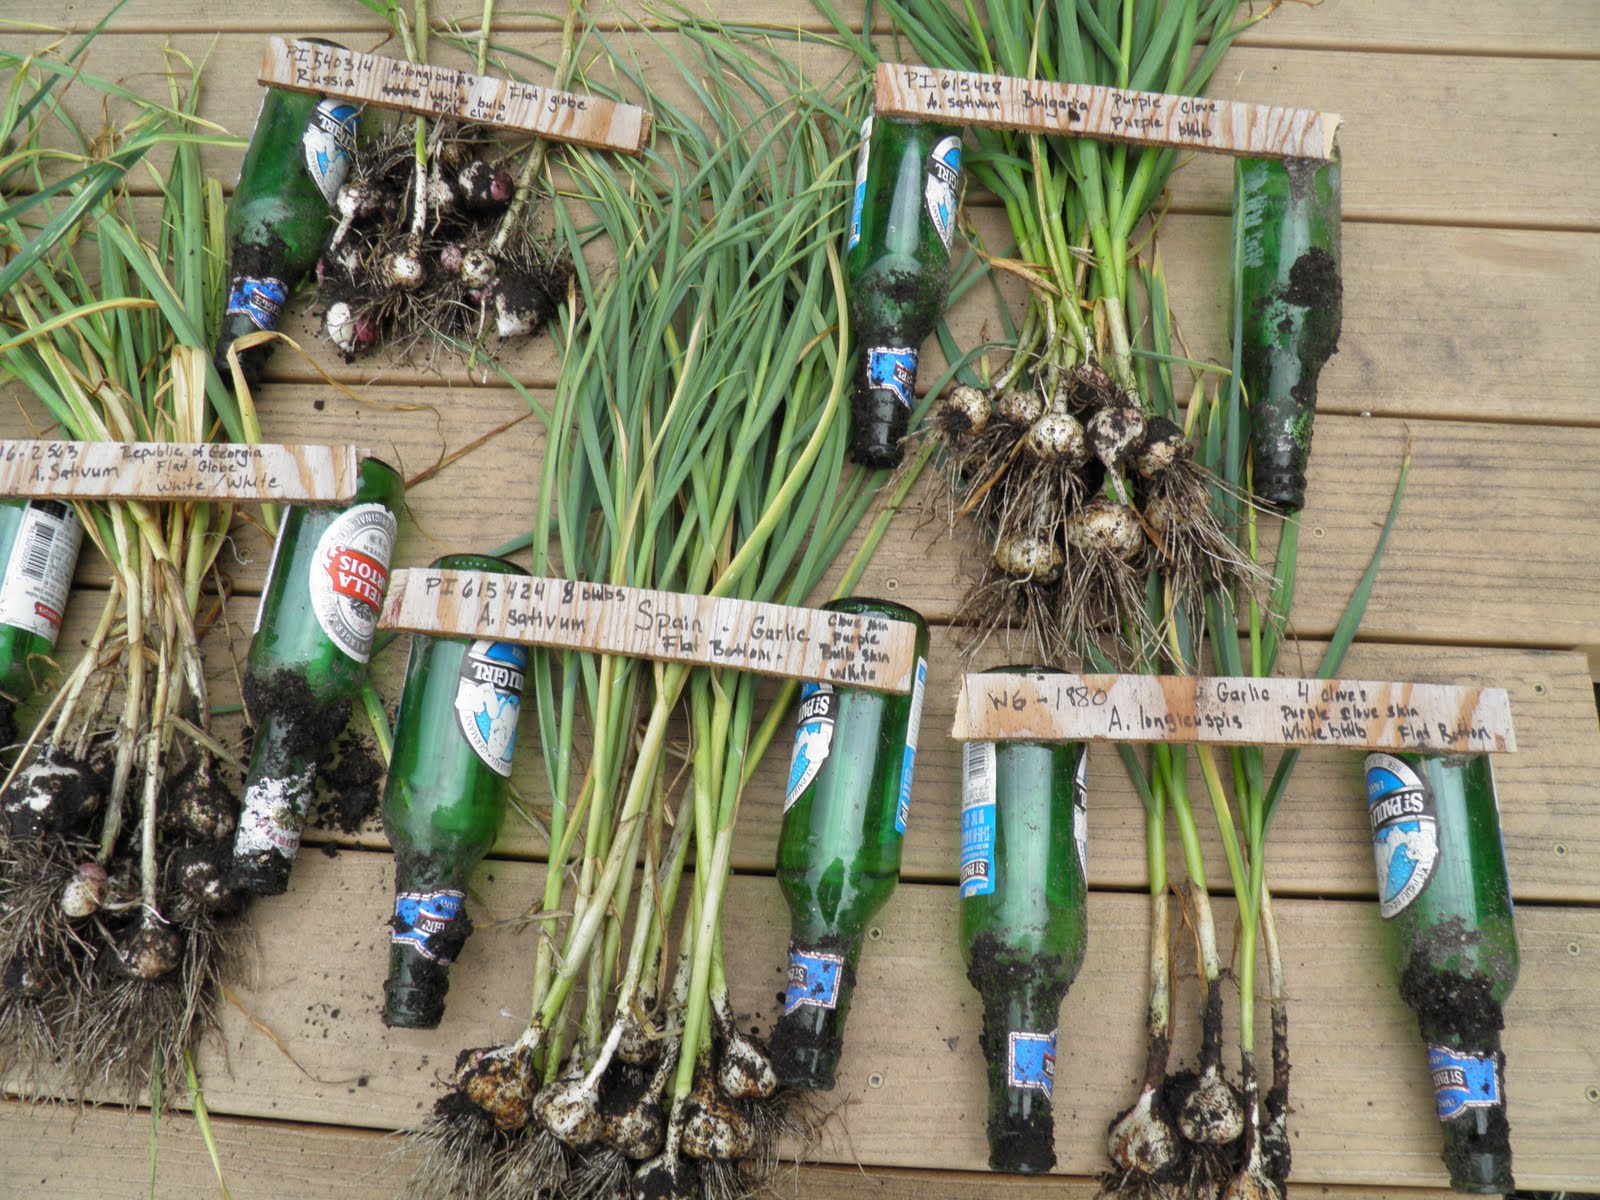
Here are some pictures of the garlic I harvested last week.
These are from the USDA test cloves that I was sent.
I cut the tops off and they are drying in front of a fan. Last year I made the mistake of leaving the tops on so I could 'braid' the garlic.
Garlic lasts for longer if it doesn't have the tops still attached.

These pics do not include the garlic I grew from cloves that I saved from previous harvests or the elephant garlic.
I have a lot of garlic!
This year I promised to plant less garlic, but it didn't work out that way!


Friday, March 19, 2010

Can Jam March - Allium

The third Can Jam challenge of the year was allium.
I was happy, because I have lots of garlic left over from last year's garden .
I also had 2 Copra onions from last year's garden that I was saving for something special.
Something special like Onion Garlic Jam!
This is seriously good stuff.
When I'm cooking something and I really like it, this is what I say to myself, "Mmmm, oh yeah. This is some seriously good stuff. I'll just try a little more."
Onion Garlic Jam
4 cups cooked garlic/onion puree -For texture if desired, reserve 1 cup onions cooked, but unpureed
4 cups brown sugar
3 cups vinegar
2 Tbs salt
1 pkg no sugar needed pectin
Variety of home grown garlic.

Garlic bulbs ready for roasting in a 400F degree oven, drizzled with olive oil and sprinkled with salt.


My 2 normal large sized onions and a JUMBO onion from the grocery store.
It was huge!


Slicing up a Copra onion. It is amazing how well these onions store through the winter. This onion is over 6 months old.


More onion slicing.


Cooking the onion slices with a little butter and salt.
The salt breaks the cell walls in the onions and helps them release more water.
Less water = more onion flavored jam.


Roasted garlic ready for pureeing.


All the ingredients in the pot ready to be boiled up.


Bring everything to a boil and then add pectin.
Return to a boil and continue cooking for 1 min at a rolling boil that can't be stirred down.
I cooked mine for about 5 mins at a rolling boil, because I wanted a very firm jam.


Pectin added - reboiling.


Pour into sterilized jars and adjust 2 piece tops.
Process in a boiling water bath canner for 15 mins.


This post to me a ridiculously long time to write, because I have a new fur baby distraction.
Tansy!


I also worked 7 out of the last 8 days..........my one day off? I made jam! LOL


Saturday, February 27, 2010

Ponzu Shrimp Potato Balls


You might remember that I received a bottle of Ponzu sauce through the Foodbuzz taste maker's program.
I made these shrimp balls and some in a croquette shape. I forgot to take any pictures of the flattened croquette shape, which is too bad, because I like them better that way.
They cooked evenly in the croquette shape, so just flatten them a little bit before baking.


I started with some boiled white potatoes ( from my garden!).
As a side note: I'm still using potatoes that I harvested from my garden last Fall.
They are a little wrinkly, but still yummy.

I riced the potatoes. This was about 2 cups of riced potatoes.


Then some roasted onions and red potatoes.
And a bag of 50 frozen defrosted shrimp.
Plus a little roasted garlic paste.


Zipped up in the food processor with a *dash* of cilantro.
Don't you love my cute spoon?!?
My friend Carol gave it to me.


Then 1/2 cup of Ponzu, an egg and 1/2 cup Parmesan cheese.
Add everything together and blend in the food processor.
After you have mixed everything together - made your "dough" - put it in a bowl and refrigerate over night.
The next day prepare your shrimp ball/croquette making area: one bowl with flour, one bowl with a whisked egg and one bowl with Ponzu breadcrumbs.
Take a tablespoon sized ball of dough and roll it first in the flour, next in the egg and finally in the breadcrumbs.
Continue with the rest of the dough.
Bake on a greased baking sheet and bake at 400F degrees for 10 mins or until toasted brown.


Thursday, February 18, 2010

Can Jam Feb. - Carrots #2

Torshi Haveej - Persian Carrot Pickle with Mint and Garlic
4 large carrots, shredded
6 radishes - thinly sliced
2 1/2 cups white vinegar
1 1/2 cups water
1 Tbs salt
1 Tbs sugar
1 tsp dried garlic cubes
1 mint tea bag
pinch red pepper flakes
Lightly pack 3 pint jars with shredded carrots and radishes. Bring brine ingredients to a boil. Pour brine into jars. Remove air bubbles. Process for 10 mins in a boil water bath canner.
Makes 3 pints

Shredded carrots and radishes.

Brine ingredients.


Filled jars.


This is a tasty carrot slaw. The mint and garlic add an unexpected dimension to the carrots.
Opposites really do attract.
Delicious!


Plus a pic from this summer. I found these 2 carrots in my garden. They were growing in a corner of a raised bed.


Sunday, January 24, 2010

Roasted Garlic Bianca Pizza on a Crisp Parmesan Crust

Roasted Garlic Bianca Pizza on a Crisp Parmesan Crust
~
Roasted Garlic
2 heads of garlic
olive oil
salt
Cut top off of garlic heads, so bulbs are exposed. Rub with olive oil and sprinkle with salt. Roast covered in a 375 F degree oven, 30-40 mins, until cloves are soft and easy to remove from the head of garlic. Remove cloves and finely chop.
White Sauce
1 cup whole milk or half and half
2 Tbs butter
2 Tbs flour
salt
cayenne pepper
roasted garlic (see directions above)
~
In a small saucepan melt butter. Stir in flour and 1 to 2 mins. Pour in milk and whisk to combine. Continue whisking and add salt and cayenne pepper. Increase heat to med. , whisking continuously, until sauce is thickened. Remove from heat and add 2 Tbs roasted garlic. Transfer to a bowl and let cool.
Parmesan Crust
1 cup warm water
2 tsp. yeast
1 tsp. honey or sugar
2 Tbs olive oil
2 3/4 cup flour
1/2 cup finely grated Parmesan cheese
~
In a large bowl, combine the water, yeast, honey and 1 Tbs of olive oil, stirring to combine. Let sit until the mixture is foamy, about 5 -10 mins. Add 1 1/2 cups of flour and Parmesan cheese. Mix until the batter is smooth. Continue adding flour 1/4 cup at a time until the dough is smooth, but slightly sticky. Turn the dough out and knead for 3-5 mins.
Place remaining olive oil in a large bowl. Place dough in the bowl, turning to coat with the olive oil. Cover with plastic wrap and set in a warm place, until doubled in size - about 1 1/2 hours.
Punch down dough. Separate dough into 4-6 lumps. On a piece of parchment paper, roll out dough very thinly.
Potato layer
Thinly slice 2 large baking potatoes.
In a large pot boil potatoes until they are soft enough to pierce, but still hold their shape.
Drain potatoes.
~
Pre-heat oven to 500 degrees. If you have a baking stone cook pizzas on that, otherwise place a flat cookie sheet in the oven to cook the pizzas on.
On each pizza crust spread 1 Tbs white sauce. Don't use too much or your crust won't crisp. Add a layer potatoes and top with shredded mozzarella cheese.
Cook for 10-12 mins.
Remove and slice.


With basil.


Baking in the oven on the baking stone.
Use a baking stone for best results.


With rosemary.


Tuesday, July 21, 2009

Garlic - It's Outta Here!

I harvested all the garlic from the garden today.

This is the first year I've ever tried growing garlic.

It was interesting.

I planted 3 beds full of it last October.

Somewhere in between then and now I remembered that I hate garlic.

Yeah........
So, guess what all my friends are getting for gifts this next year!
It looked nice growing in the garden and it was fun to plant it when everything else was dead.
Maybe I can learn to like garlic.

Well, I like the taste of garlic.

I just hate smelling like it the next day.
I think I might try pickling some of it.


Garlic in the garden - The big ones are elephant garlic.


My fancy garlic drier - that I made out of junk.